15 Wedding Craft Ideas for Beautiful DIY Wedding Decor
Discover 15 stunning wedding craft ideas to create beautiful DIY wedding decor on a budget. Unique, handmade touches your guests will love.
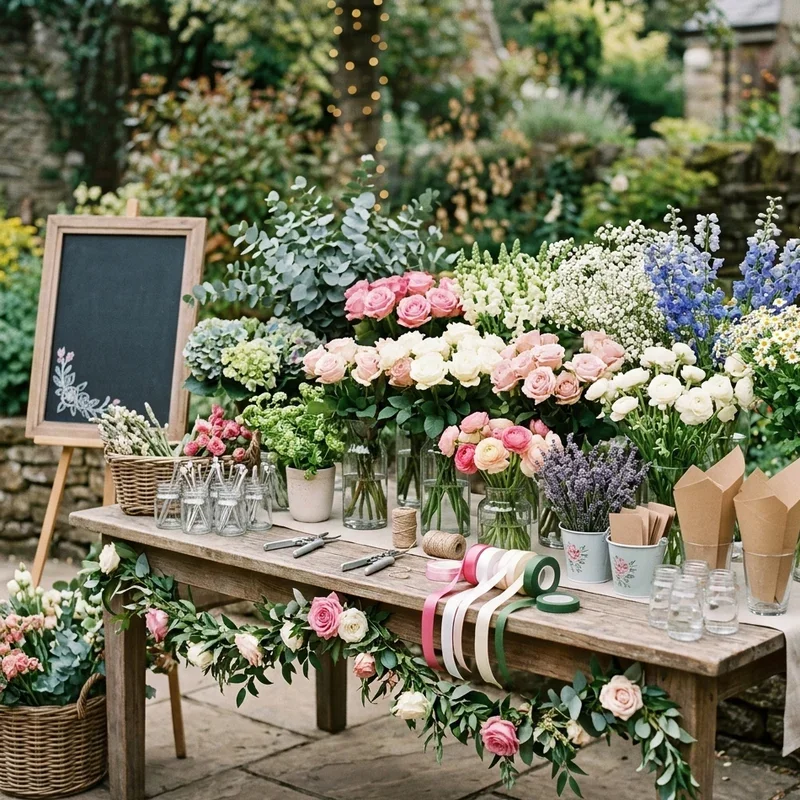
Your wedding day deserves to feel like it belongs entirely to you, and nothing says personal quite like handmade decor scattered across every corner of your celebration. Think about it, would you rather have a venue that looks like every other cookie cutter event, or a space that whispers your love story in every detail? DIY wedding decor lets you pour your heart into the atmosphere without draining your savings account dry. From dreamy centerpieces to whimsical signage, crafting your own decorations transforms your celebration into something guests will remember long after the last dance ends. Whether you are a seasoned crafter or someone who has never picked up a glue gun before, these fifteen ideas will spark your imagination and give you practical projects you can actually pull off before the big day arrives.
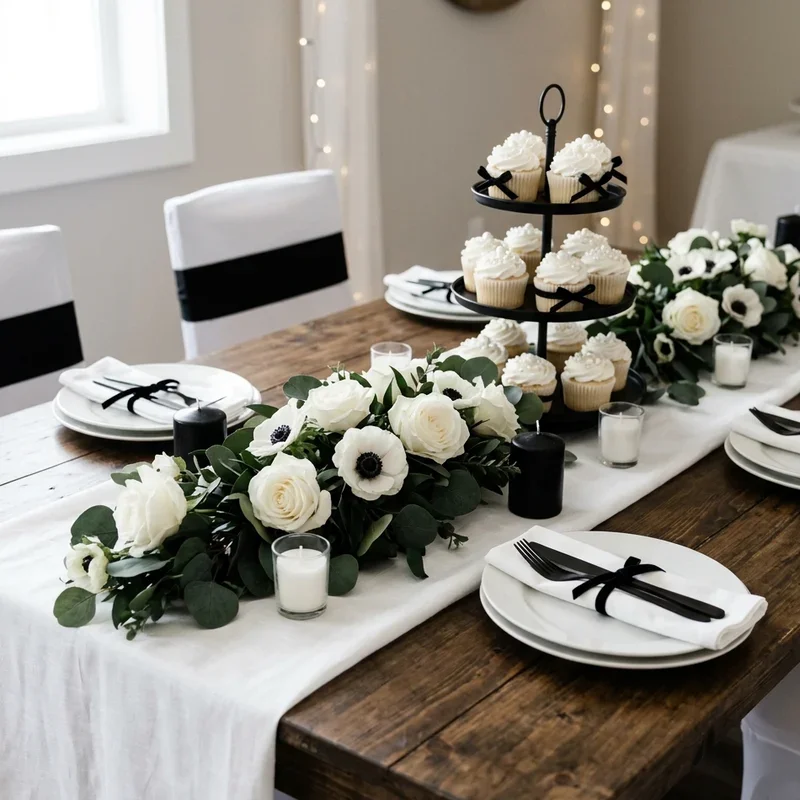
1. Hand-Poured Candle Centerpieces
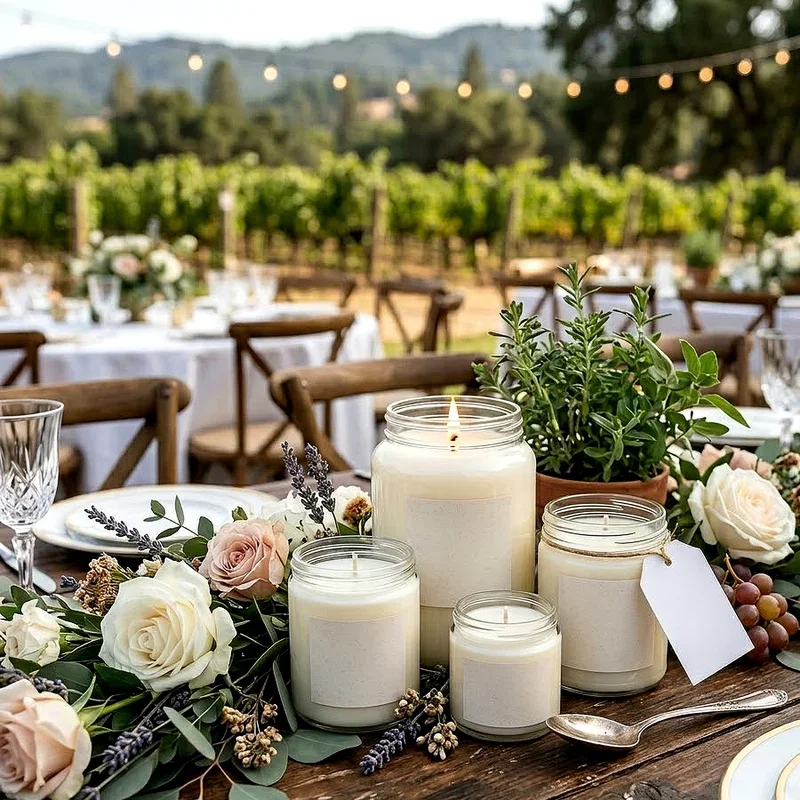
Imagine your reception tables glowing with candles you made yourself, each one carrying a fragrance that reminds you of your first date or your favorite vacation together. Hand-poured candles are surprisingly simple to create, and they double as gorgeous centerpieces that set the mood instantly. All you need is soy wax, essential oils, wicks, and glass containers that match your wedding palette. You can pour them into vintage teacups for a romantic vibe or sleek geometric holders for something modern. The beauty of this project is that guests can take them home as favors, giving your loved ones a glowing little memory of the evening. Start pouring about three weeks before the wedding so you have plenty of time to experiment with scents and colors.
2. Macrame Table Runners
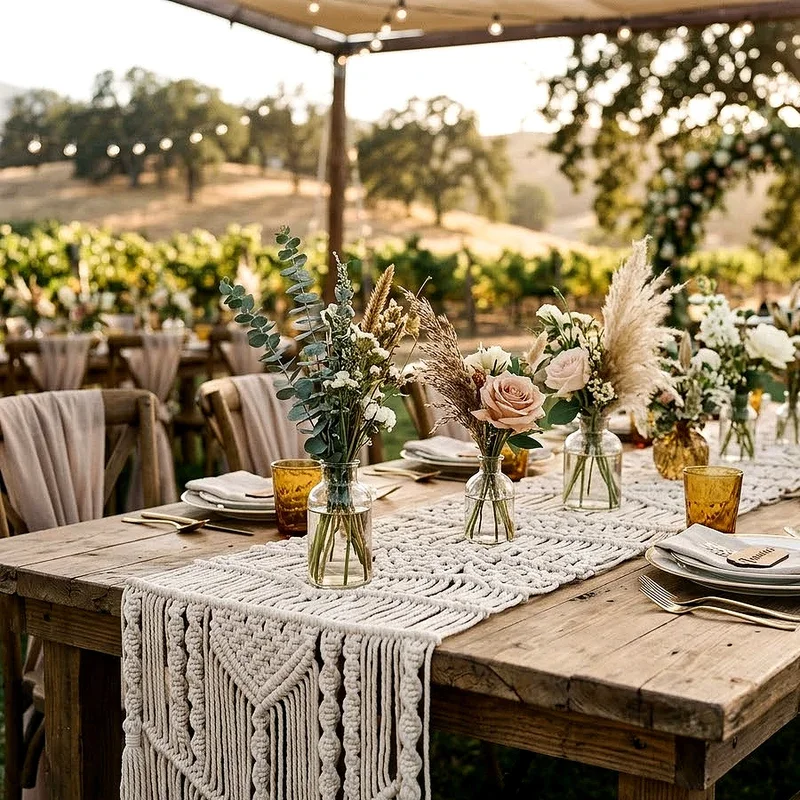
If your wedding leans toward bohemian or rustic charm, macrame table runners will steal the show without stealing your budget. Knotting cotton cord into intricate patterns feels meditative, almost like the craft itself is preparing you for the calm you will need on your wedding day. Each runner takes a few hours depending on the length, but the result is a textured masterpiece that photographs beautifully against wooden farmhouse tables. You do not need to be an expert knotter either, because basic half hitch and square knot patterns create stunning visual effects all on their own. Pair them with loose wildflower arrangements and taper candles for a look that feels effortlessly elegant. Your guests will assume you hired a professional, and you can just smile knowingly.
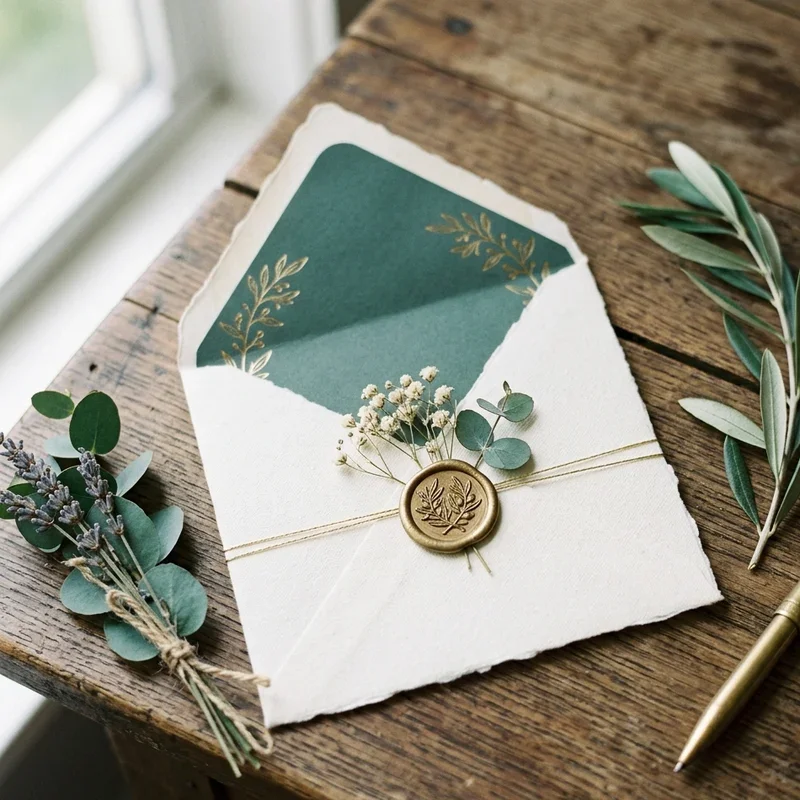
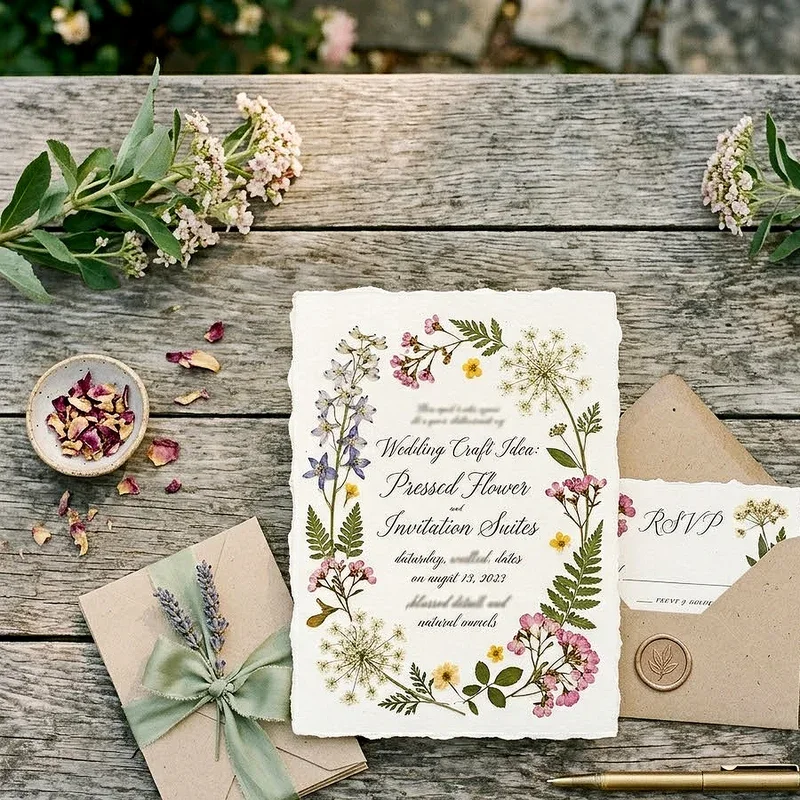
3. Pressed Flower Invitation Suites
Why settle for ordinary printed invitations when you can send your guests a tiny garden? Pressed flower invitation suites combine the art of botanical preservation with elegant stationery design, and the result looks like something out of a high-end boutique. Start pressing flowers about six weeks before you need them, using heavy books or a wooden flower press. Once they are flat and dry, arrange them on cardstock and secure them with a thin layer of clear adhesive or a vellum overlay. Lavender sprigs, fern fronds, and small daisies work particularly well because they hold their shape and color after pressing. Each invitation becomes a one-of-a-kind piece of art that sets the tone for your entire celebration before guests even arrive.
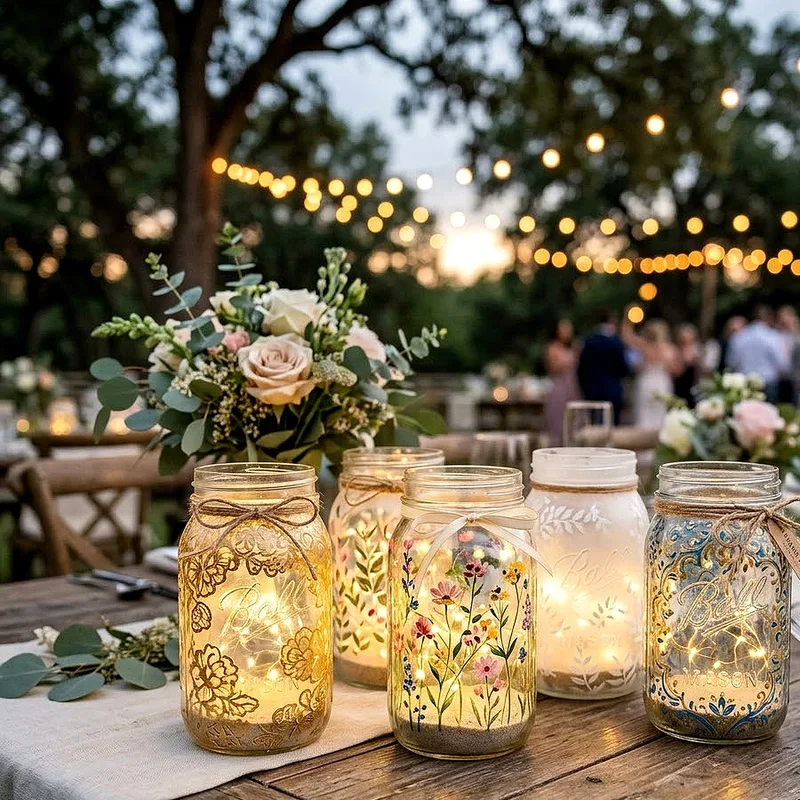
4. Painted Glass Jar Luminaries
You know those glass jars sitting in your recycling bin right now? They are about to become the most charming lighting feature at your wedding reception. Painted glass jar luminaries transform ordinary containers into magical vessels of warm light that scatter soft color across your tables and pathways. Use chalk paint for an opaque matte finish or translucent glass paint for a stained glass effect that lets candlelight dance through. You can stencil on your initials, paint ombre gradients in your wedding colors, or even splatter metallic gold for a celestial look. Line your walkways with them, cluster them as centerpieces, or hang them from shepherd hooks along the ceremony aisle. The cost is practically nothing, but the visual impact is absolutely everything you want on your special night.
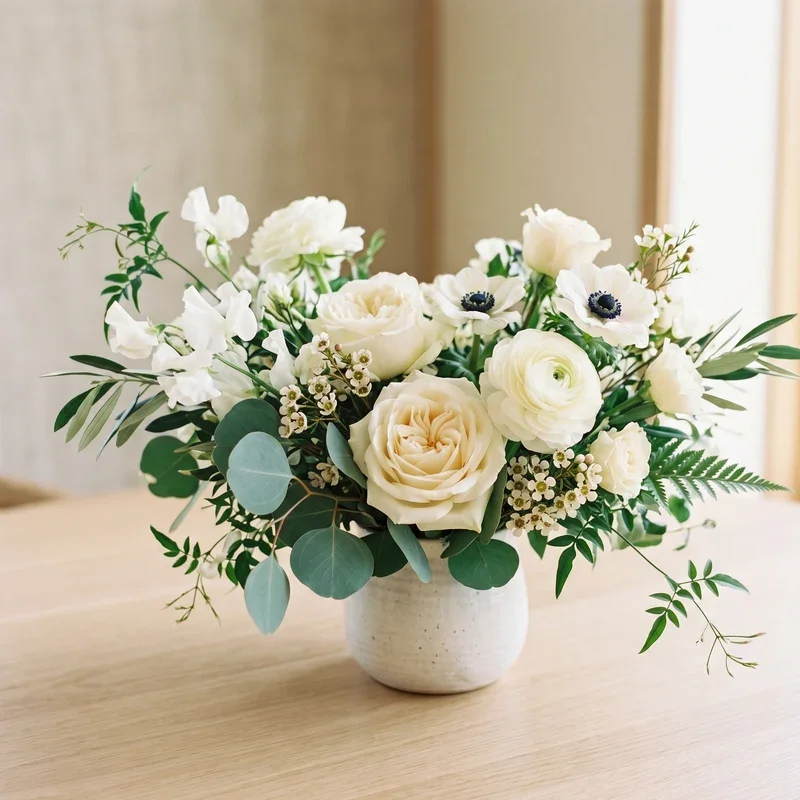
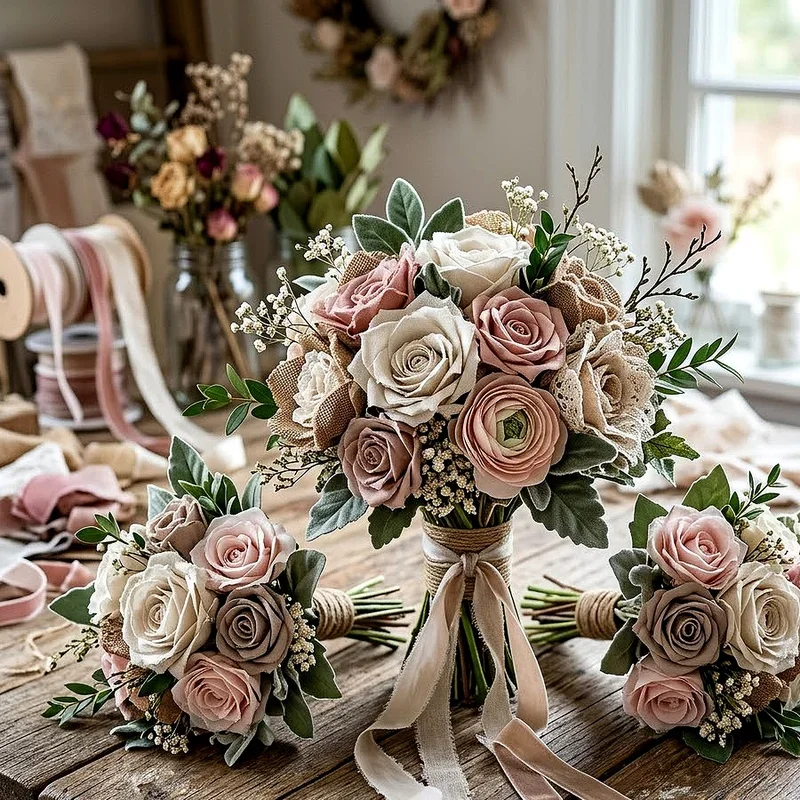
5. Fabric Flower Bouquets
Fresh flowers wilt before the reception ends, but a fabric flower bouquet stays perfect forever, sitting on your mantle as a daily reminder of the vows you exchanged. Crafting flowers from silk, satin, or even cotton fabric gives you complete control over color matching and design consistency. You can mix textures by combining burlap roses with delicate organza peonies for a layered look that no florist could replicate at any price. Each bloom takes about fifteen minutes once you get the technique down, and tutorial videos online break the process into foolproof steps. Add pearl pins to the centers or wrap stems with twine for rustic appeal. Your bridesmaids will love carrying bouquets that never trigger allergies, and you will love keeping yours intact for decades to come.
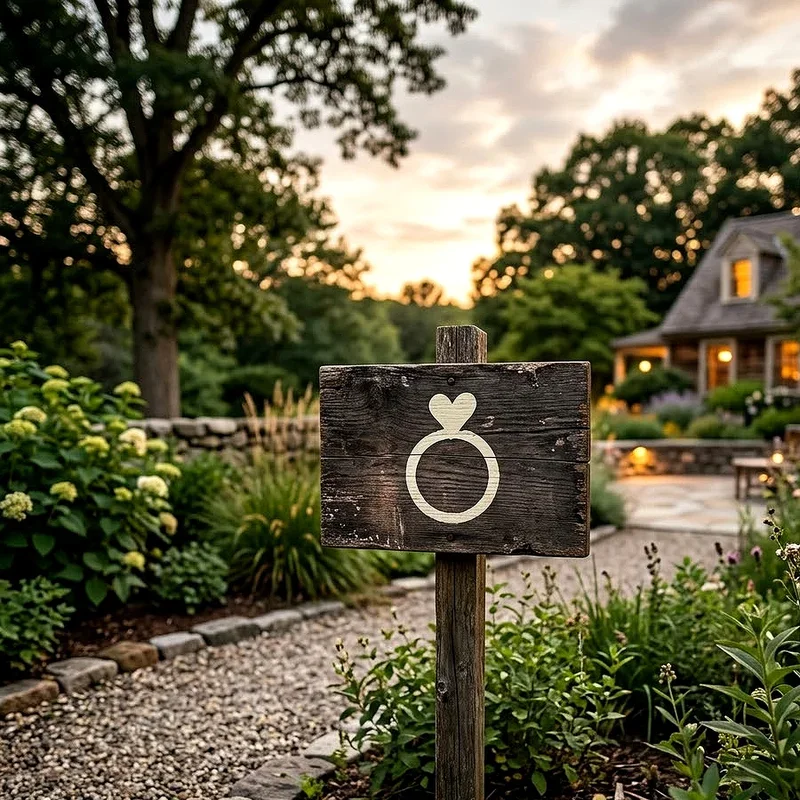
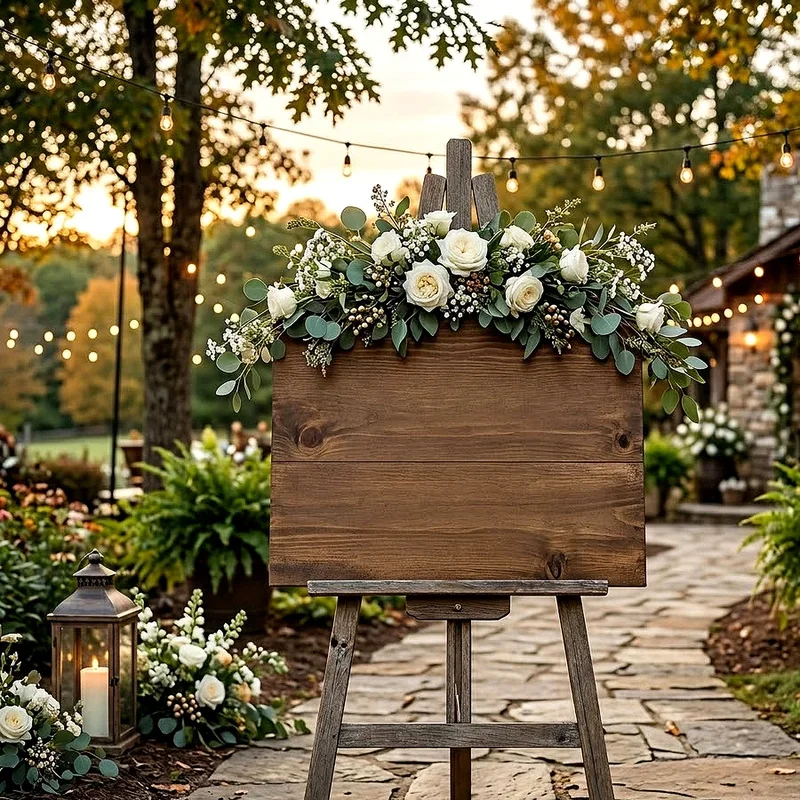
6. Personalized Wooden Sign Welcome Board
A handcrafted wooden welcome sign greets your guests with warmth and personality the moment they step into your venue. Think of it as the front door of your celebration, setting expectations and building excitement before anyone even finds their seat. Start with a reclaimed wood plank or a smooth plywood board cut to your desired size, then sand it down and apply a stain that complements your color scheme. Use paint pens or acrylic paint to hand letter your names, the date, and a sweet message like "welcome to our happily ever after." If freehand lettering intimidates you, print a template, trace it with carbon paper, and paint over the lines. Finish with a clear sealant so it survives outdoor weather conditions and becomes a keepsake you hang in your home.
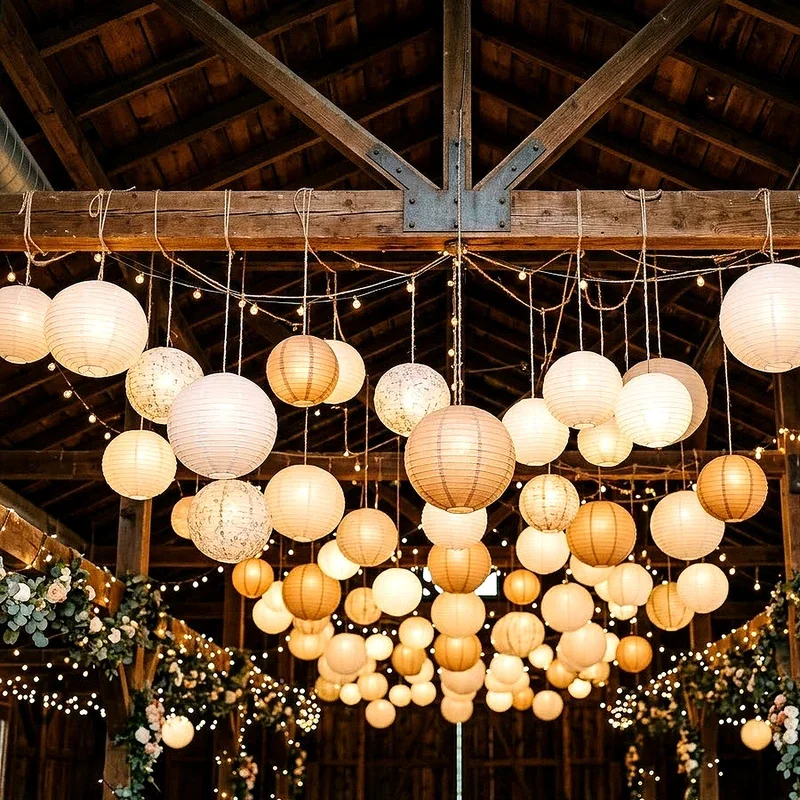
7. Paper Lantern Ceiling Installations
Looking up should feel as magical as looking around, and paper lantern ceiling installations create that dreamy overhead canopy every wedding venue needs. Mixing different sizes and shades of paper lanterns produces depth and dimension that transforms even the most basic ballroom into a fairy tale setting. Choose lanterns in your wedding palette, add some in metallic gold or soft white for contrast, and hang them at varying heights using fishing line for an invisible floating effect. Battery operated LED lights inside each lantern eliminate fire hazards while still casting that warm, inviting glow across the room. The installation process takes a couple of hours with a small team, but the impact lasts the entire celebration. Your dance floor will look like something from a movie scene that guests will photograph endlessly.
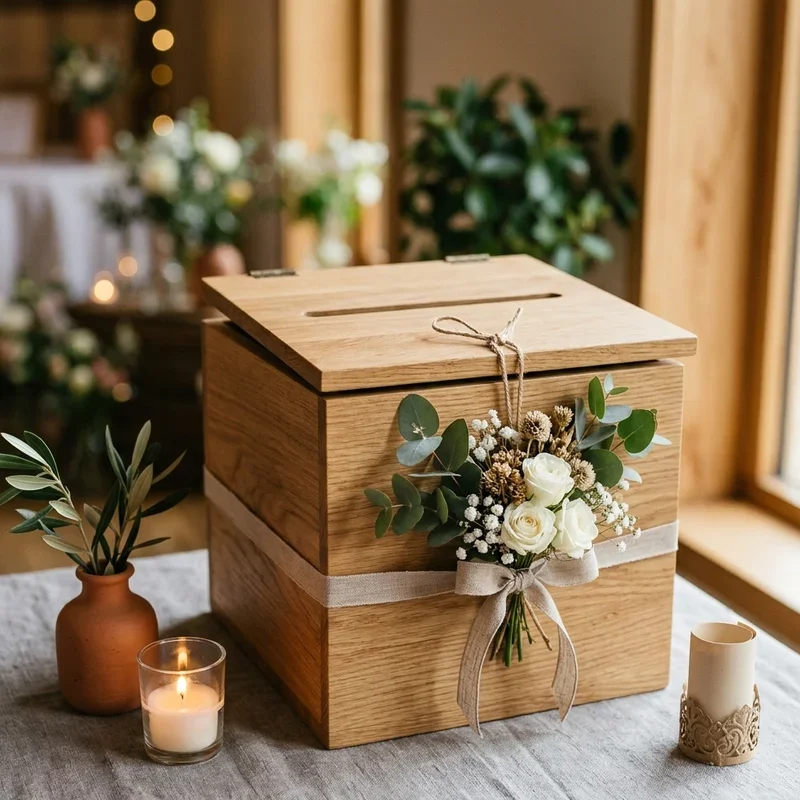
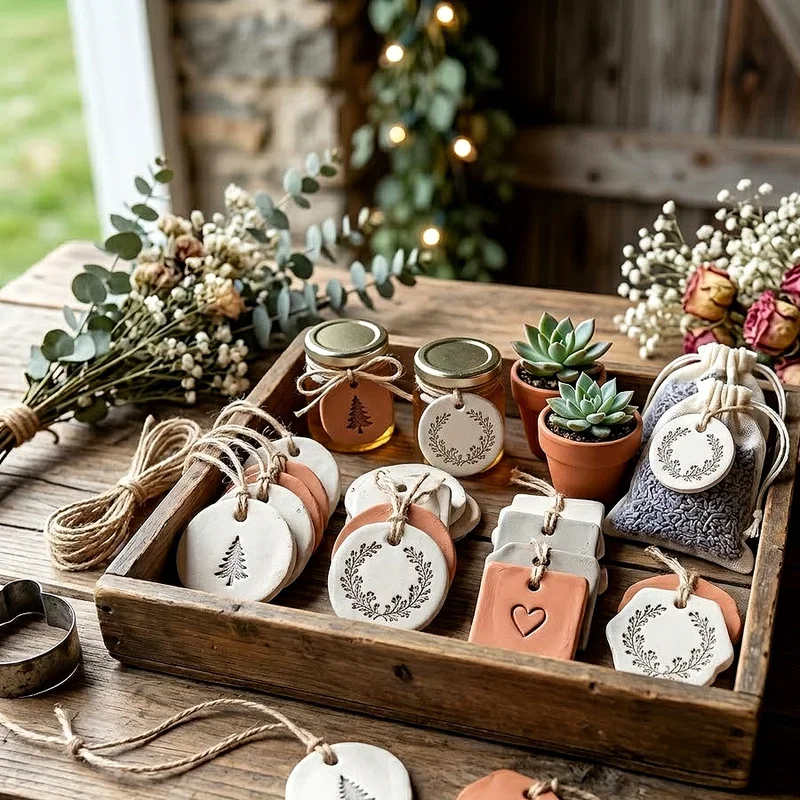
8. Hand-Stamped Clay Favor Tags
Wedding favors deserve more than a generic sticker slapped on a box, and hand-stamped clay tags elevate even the simplest gift into something personal and memorable. Air-dry clay is inexpensive and incredibly easy to work with, requiring no kiln or special equipment beyond a rolling pin and letter stamps. Roll the clay flat, cut it into circles or hearts using cookie cutters, stamp each guest's name or a short thank you message, and punch a hole before it dries overnight. Once hardened, you can leave them natural for a minimalist aesthetic, paint them with watercolors, or brush on a thin coat of gold leaf for added elegance. Thread twine or ribbon through the hole, attach them to favor bags, and watch your guests genuinely appreciate the handmade effort you put into every detail.
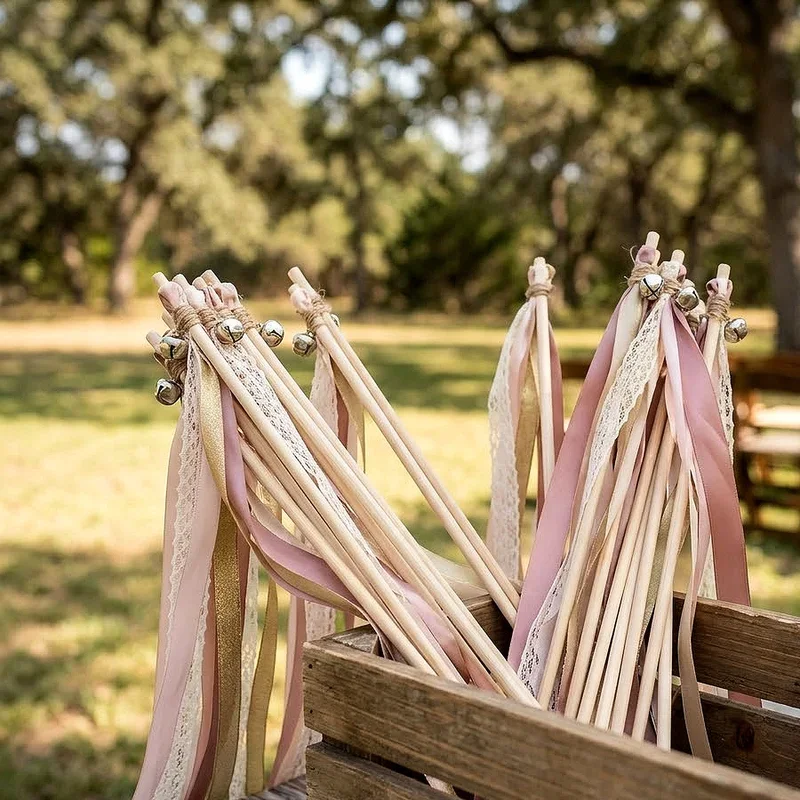
9. Ribbon Wand Send-Off Sticks
Forget the mess of rice or the brief spectacle of sparklers, because ribbon wand send-off sticks create a colorful, photogenic farewell that looks incredible in every single picture. These playful wands are ridiculously easy to assemble and cost next to nothing when you buy ribbon in bulk from a craft store. Cut wooden dowels to about twelve inches, attach three or four long ribbons in your wedding colors using hot glue or small nails, and optionally tie a tiny bell at each ribbon end for a joyful jingling sound. Place them in decorative baskets near the exit with a sign that says "wave us goodbye," and your photographer will capture a tunnel of fluttering color as you make your grand departure. It is one of those details that feels effortless but delivers pure magic.
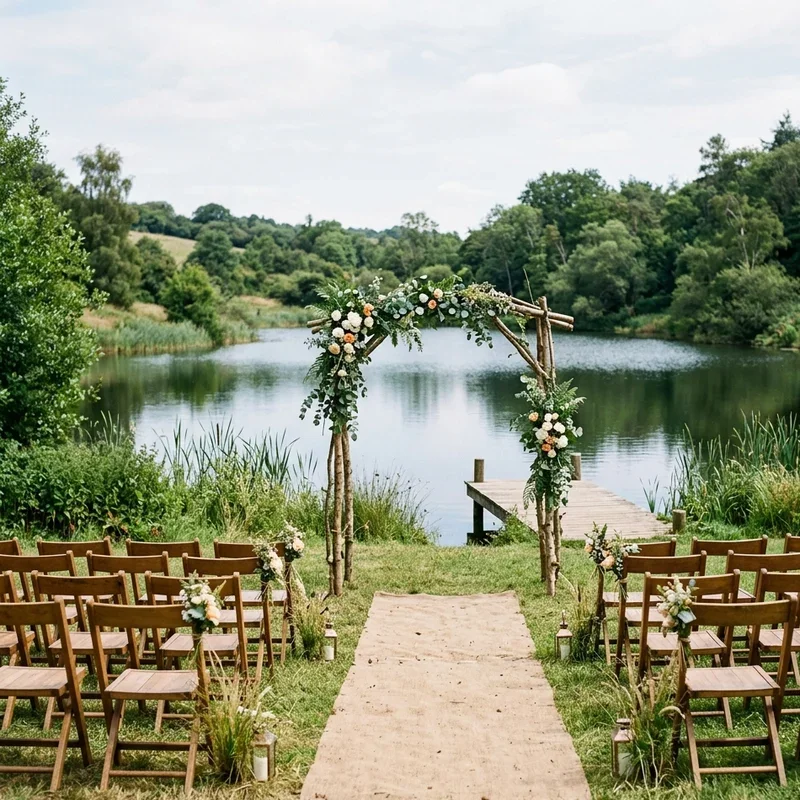
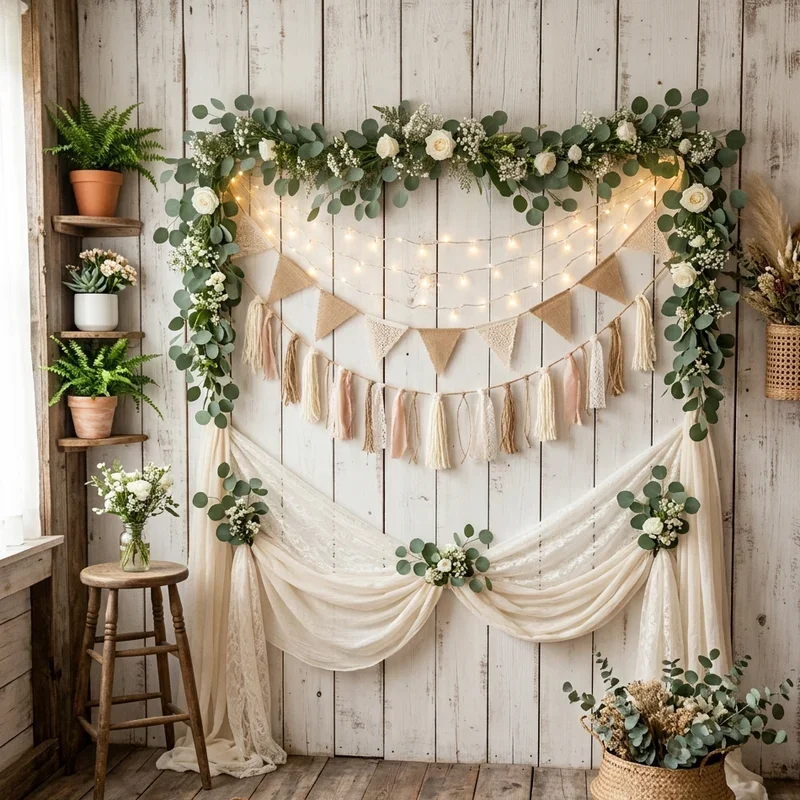
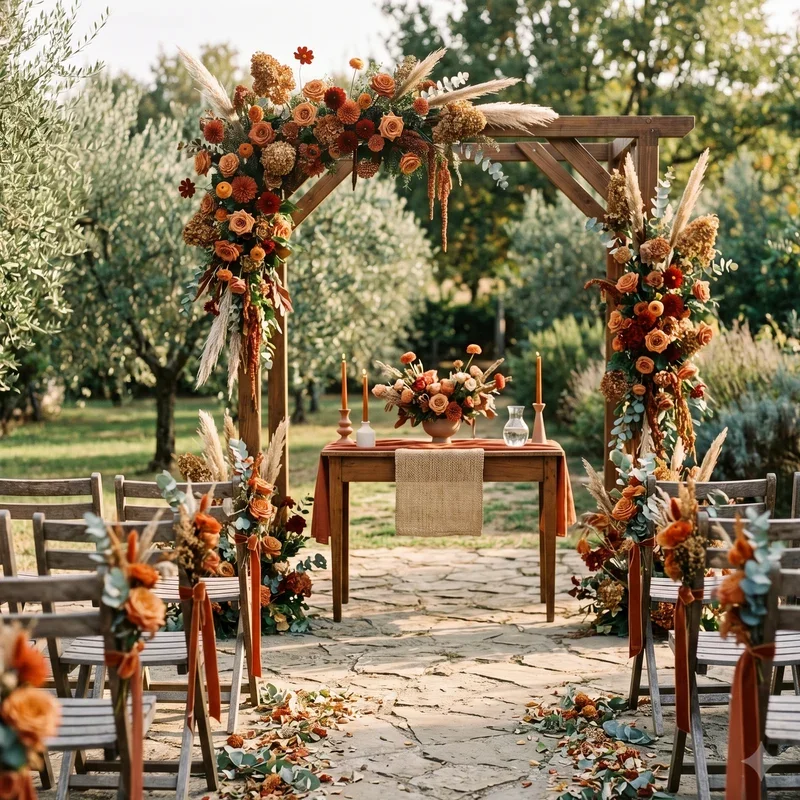
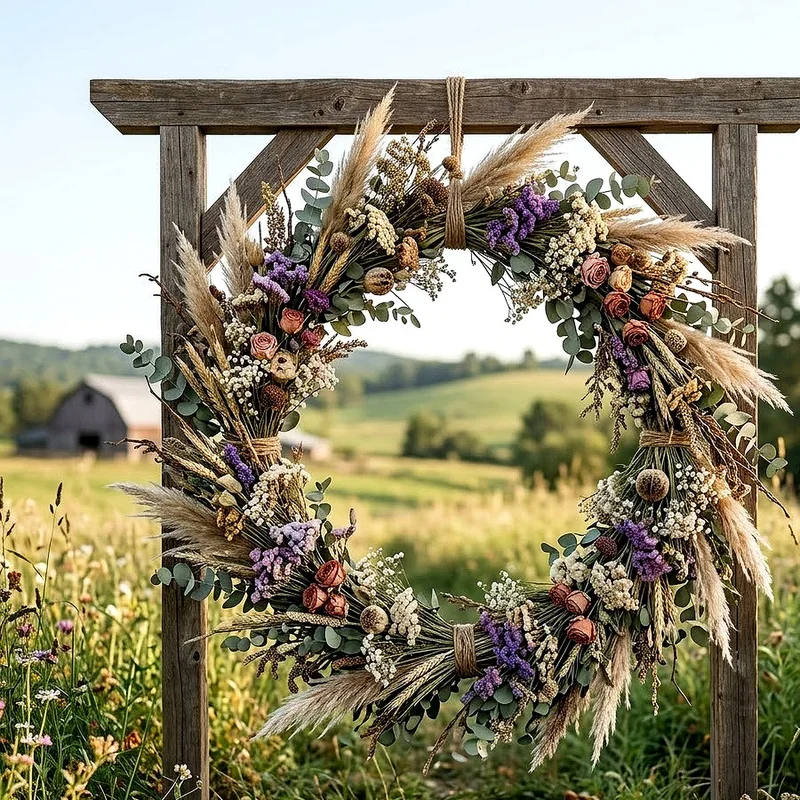
10. Dried Flower Wreath Backdrop
A dried flower wreath backdrop behind your ceremony altar or head table creates a focal point so breathtaking that it practically photographs itself from every angle. Dried flowers carry an earthy, timeless quality that fresh arrangements simply cannot match, and they require zero water or maintenance throughout the entire event. Build a base from a large embroidery hoop, a grapevine wreath form, or even a custom welded metal ring if you want something larger. Attach bundles of dried eucalyptus, pampas grass, lavender, and statice using floral wire, layering textures until the wreath feels full and organic. You can make this weeks ahead without worrying about wilting, which removes one major stressor from your timeline. Hang it with satin ribbon or leather cord for a backdrop that combines rustic beauty with sophisticated elegance.
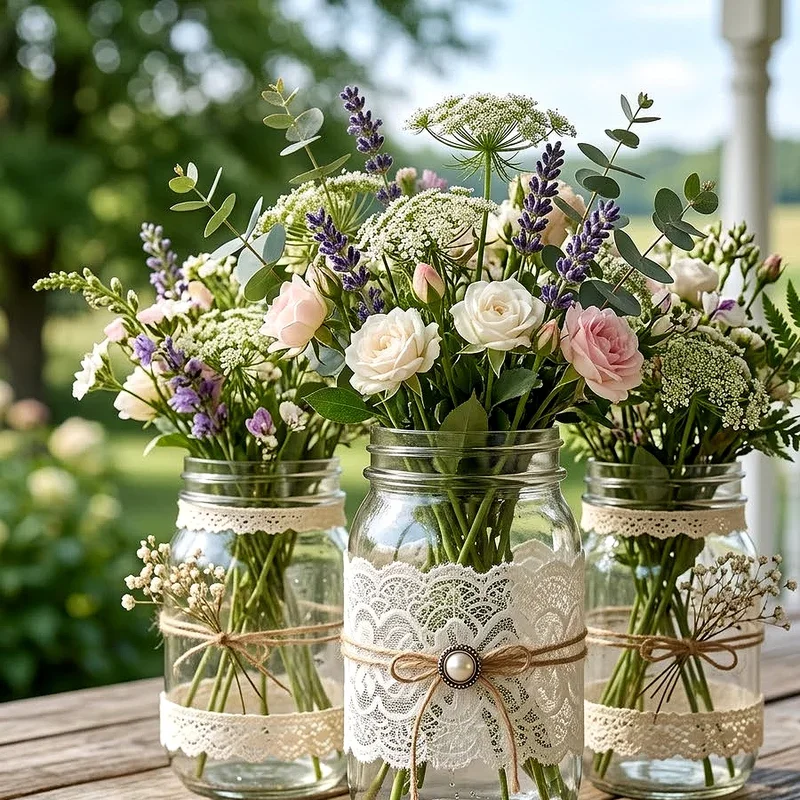
11. Lace-Wrapped Mason Jar Vases
There is something undeniably romantic about lace, and wrapping mason jars with it creates vases that feel like they belong in a vintage love story rather than a hardware store. This project requires mason jars, lace trim, spray adhesive or hot glue, and about ten minutes per jar once you find your rhythm. Wrap the lace around the outside, secure it in place, and tie burlap ribbon or twine around the neck for a finished look that balances rough and delicate textures perfectly. Fill them with baby's breath, wildflowers, or single stem roses for centerpieces that feel curated without the designer price tag. You can also place battery operated tea lights inside for an evening glow that turns each jar into a tiny lantern. Scatter them across tables for a cohesive vintage atmosphere.
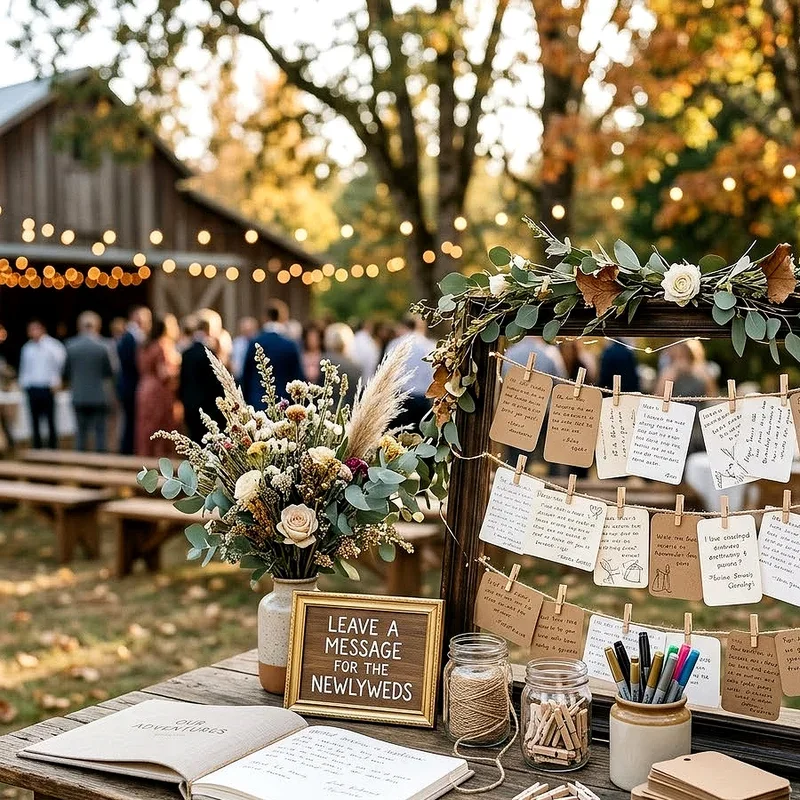
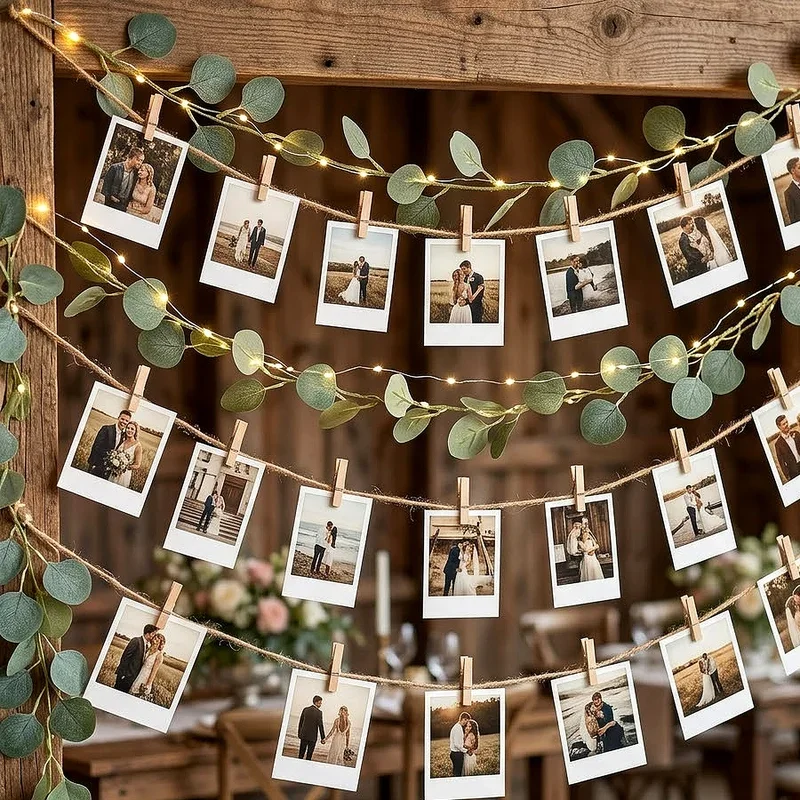
12. Customized Photo Display Garland
Your love story did not start at the altar, so why not show guests the journey that brought you there with a customized photo display garland? String twine or fairy lights across a wall, drape them between two trees, or stretch them along a fence, then clip your favorite photos in chronological order using mini wooden clothespins. Include snapshots from your first date, vacations, silly selfies, and the proposal for a timeline that guests will crowd around between courses. Print photos in a consistent size and filter for a polished look, or mix polaroids with printed images for something more eclectic and spontaneous. This project takes less than an hour to assemble but generates more conversation and emotion than almost any other decoration at the reception. It reminds everyone that your wedding celebrates a story already beautifully underway.
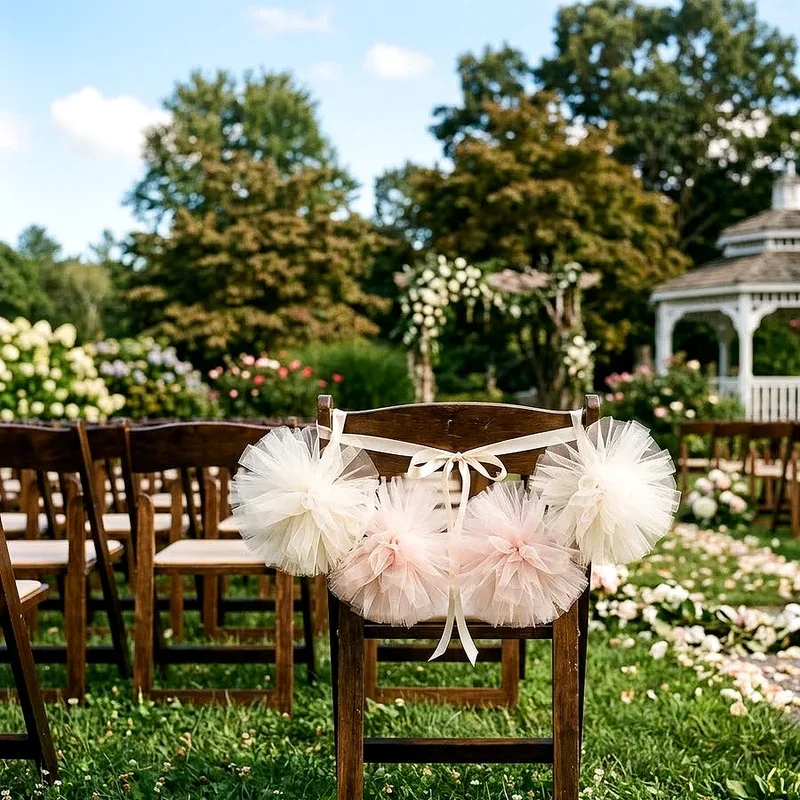
13. Tulle Pom-Pom Chair Accents
Reception chairs often get overlooked, but tulle pom-pom accents turn ordinary seating into part of the decor story you are telling throughout the venue. Making tulle pom-poms follows the same technique as yarn pom-poms, but the result is airier and more ethereal, like little clouds perched on the back of each chair. Cut strips of tulle, wrap them around a cardboard template, tie the center tightly, then fluff each side until you have a soft sphere that catches the light beautifully. Attach them to chair backs with ribbon or nestle them on plate chargers as part of each place setting for a playful touch. Choose tulle in your wedding colors or stick with classic white for timeless elegance that complements any palette. The cost per pom is pennies, but the cumulative effect across a room is stunning.
14. Calligraphy Table Number Cards
Table numbers do not have to be boring plastic stands from a party supply store when you can hand-letter gorgeous calligraphy cards that double as art prints guests want to steal. Even if your handwriting looks like a doctor's prescription, modern calligraphy is learnable with a few practice sessions and a pointed pen or brush pen. Use thick watercolor paper or cardstock, write the number with flowing strokes, and add small flourishes or botanical sketches around the edges to complete the look. Frame each card in a thrifted or dollar store frame for an elevated presentation that sits elegantly on every table. If calligraphy truly terrifies you, print a light guide underneath and trace over it with ink for results that look entirely handmade. These cards become keepsakes you can repurpose as home decor long after the celebration ends.
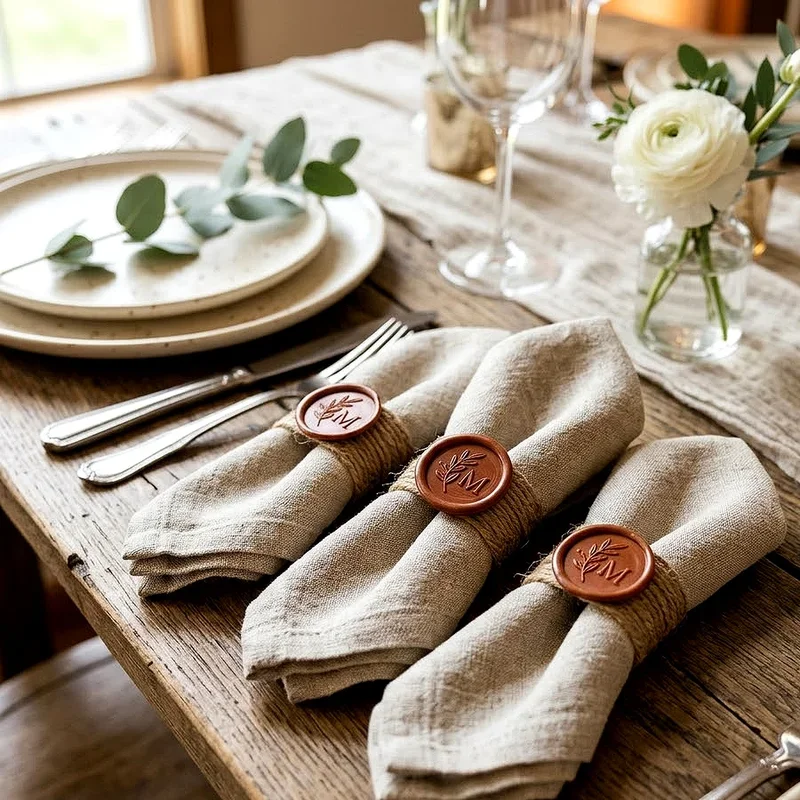
15. Wax Seal Napkin Rings
Wax seals carry an old-world elegance that makes every guest feel like they are opening a royal invitation, and using them as napkin rings brings that same sophistication to your table settings. Purchase a custom wax seal stamp with your initials or a meaningful symbol, melt sealing wax in your wedding color, and press perfect seals onto short loops of satin ribbon tied around each rolled napkin. The process is rhythmic and satisfying once you master the wax temperature and pressure, and you can produce dozens in an evening while watching your favorite show. Each seal dries within seconds, creating a hard, glossy emblem that guests will admire before they even unfold their napkins. This tiny detail communicates an extraordinary level of care and intentionality that elevates the entire dining experience from lovely to unforgettable.
Conclusion
Creating your own wedding decor is not just about saving money, although your wallet will certainly thank you. It is about weaving your personality and creativity into a celebration that feels authentically yours. Every hand-poured candle, every knotted macrame runner, and every pressed flower tells guests that this day matters enough to craft with your own hands. These fifteen projects prove that beautiful wedding decor does not require a professional decorator or an unlimited budget. All you need is time, imagination, and the willingness to let your love story shine through details you built yourself.
Read next: 15 Wedding Pallet Ideas for Rustic and Creative Decor
Frequently Asked Questions
Q1. How far in advance should I start making DIY wedding decorations?
A: Begin crafting three to four months before your wedding date for comfort.
Q2. What is the most budget-friendly DIY wedding craft idea?
A: Painted glass jar luminaries cost nearly nothing using recycled jars and paint.
Q3. Can I make DIY wedding decor without any crafting experience?
A: Absolutely, most projects require only basic supplies and simple online tutorials.
Q4. How do I ensure my DIY wedding decor looks professional?
A: Practice each project beforehand and maintain consistent colors throughout all pieces.
Q5. What tools should every DIY wedding crafter have ready?
A: Keep a glue gun, sharp scissors, craft wire, and measuring tape nearby.
Stay up to date with our latest ideas!